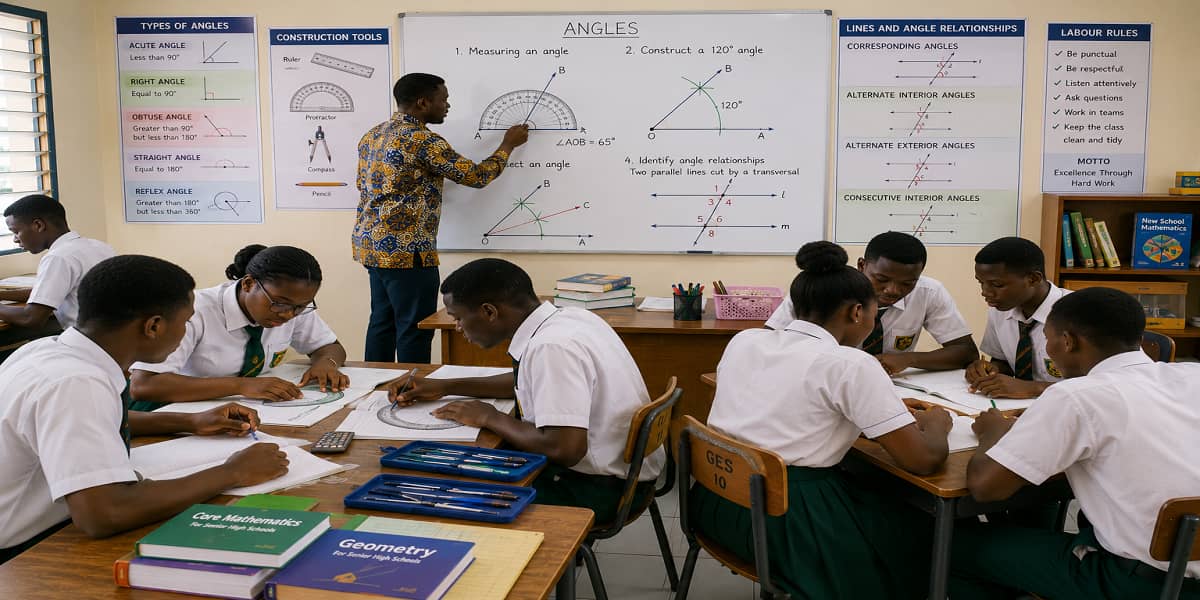
Referents for Angles
Introduction
Angles are all around us. We see them in doors, windows, books, road signs, buildings and many other objects. Understanding angles helps us describe shapes, construct objects accurately and solve many practical problems in mathematics and everyday life.
In this lesson, you will learn how to identify angles from everyday objects, recognise different angle sizes, measure and construct angles accurately, and use angle relationships to solve simple geometric problems.
Key Concepts
- Angle: The space formed when two rays meet at a common endpoint called the vertex.
- Vertex: The point where the two rays meet.
- Ray: A straight path that starts from one point and extends endlessly in one direction.
- Referent: Any object around us that helps us understand what an angle looks like.
Explanation
Before learning how to measure or construct angles, it is helpful to recognise them in familiar objects. These objects are called referents for angles because they help us connect mathematical ideas with everyday experiences.
For example, the corner of a classroom, an open door, tree branches and the space between your fingers all form angles. Looking carefully at these objects helps you recognise that angles are a natural part of the world around us.
Angles are not found only in mathematics books. They appear naturally in our homes, schools and surroundings. Learning to identify these angles makes it easier to understand how angles are measured and used in geometry.
Types of Angles
Angles are grouped according to their sizes. Knowing the different types of angles helps you describe shapes correctly and solve geometry problems with confidence.
| Type of Angle | Measurement |
|---|---|
| Acute Angle | Less than 90°. |
| Right Angle | Exactly 90°. |
| Obtuse Angle | Greater than 90° but less than 180°. |
| Straight Angle | Exactly 180°. |
| Reflex Angle | Greater than 180° but less than 360°. |
As the opening between the two rays becomes wider, the type of angle changes. Recognising these angle sizes will help you solve many geometry questions.
Measuring Angles
A protractor is the instrument used to measure angles. It is marked in degrees (°), making it easy to find the size of an angle accurately.
To measure an angle:
- Place the centre of the protractor exactly on the vertex.
- Align one arm of the angle with the zero line of the protractor.
- Read the number where the other arm crosses the scale.
Always check that the protractor is correctly aligned before taking a reading. Starting from the wrong zero mark can lead to an incorrect measurement.
Angles are measured in degrees (°). A right angle is exactly 90°, while a straight angle is exactly 180°.
Constructing Angles Using a Protractor
Besides measuring angles, a protractor can also be used to draw angles of any given size. This skill is useful in geometry, technical drawing and construction work.
To construct an angle of 120°:
- Draw a straight line and mark one endpoint as the vertex.
- Place the centre of the protractor on the vertex.
- Align the zero line of the protractor with the drawn line.
- Locate the 120° mark and make a small point.
- Use a ruler to join the vertex to the marked point.
Always keep the centre of the protractor exactly on the vertex before taking any measurement.
Constructing Angles Using a Compass
A compass helps you copy an angle without measuring it. Instead of reading degrees, the compass transfers the same distance from one angle to another, making both angles equal.
To copy an angle:
- Draw one arm of the new angle.
- Draw an arc across the given angle.
- Draw another arc of the same radius from the new vertex.
- Transfer the distance between the two points where the first arc cuts the given angle.
- Join the new point to the vertex.
This method is useful when you need to reproduce an angle accurately without knowing its exact measurement.
Bisecting an Angle
To bisect an angle means to divide it into two equal angles. A compass and ruler make this construction accurate without using a protractor.
Follow these steps:
- Draw an arc from the vertex so that it cuts both arms of the angle.
- Using the same compass width, draw two arcs from the points where the first arc meets the arms.
- Mark the point where the two arcs cross.
- Join this point to the vertex.
- The new line is the angle bisector.
After completing the construction, the angle is divided into two equal parts. This method is widely used in geometry and technical drawing because it gives an accurate result without measuring the angle.
Changing the compass width while drawing the construction arcs will give an incorrect angle bisector. Keep the compass opening the same until the construction is complete.
Parallel Lines, Perpendicular Lines and Transversals
Lines can meet in different ways. Understanding how they relate to one another makes it easier to solve problems involving angles.
- Parallel Lines: Lines that stay the same distance apart and never meet, even when extended.
- Perpendicular Lines: Lines that intersect to form a right angle of exactly 90°.
- Transversal: A line that crosses two or more other lines.
When a transversal crosses two parallel lines, several pairs of angles are formed. These angle relationships help us determine unknown angles without measuring each one individually.
Angles Formed by a Transversal
Some pairs of angles formed when a transversal cuts two parallel lines have special relationships.
| Angle Relationship | Property |
|---|---|
| Corresponding Angles | Are equal. |
| Alternate Interior Angles | Are equal. |
| Alternate Exterior Angles | Are equal. |
| Vertically Opposite Angles | Are equal. |
| Consecutive Interior Angles | Add up to 180°. |
When two parallel lines are cut by a transversal:
- Corresponding angles are equal.
- Alternate interior angles are equal.
- Alternate exterior angles are equal.
- Vertically opposite angles are equal.
- Consecutive interior angles add up to 180°.
Examples
Example 1
Problem: A straight line is divided into two angles. One angle measures 45°. Find the other angle.
- A straight angle measures 180°.
- Subtract the known angle from 180°.
- 180° − 45° = 135°.
Final Answer: 135°
Example 2
Problem: Two complementary angles are such that one angle is twice the other. Find both angles.
- Let the smaller angle be x.
- The larger angle is 2x.
- x + 2x = 90°.
- 3x = 90°.
- x = 30°.
- The larger angle is 60°.
Final Answer: 30° and 60°
Application and Activities
- Identify examples of angles in your classroom, home or community.
- Measure different angles using a protractor.
- Construct angles using both a protractor and a compass.
- Bisect a given angle accurately.
- Find unknown angles formed when a transversal cuts parallel lines.
Practice
- Basic: Draw and label an acute angle, a right angle and an obtuse angle.
- Moderate: Construct angles measuring 45°, 60°, 90° and 120° using a protractor.
- Applied: Explain how angle relationships formed by parallel lines can help builders, carpenters and engineers in their work.
Summary
Angles are found in many objects and structures around us. In this lesson, you learned how to identify referents for angles, classify angles according to their sizes, measure and construct angles, bisect an angle, and understand the relationships between angles formed when a transversal cuts parallel lines. These concepts provide a strong foundation for studying geometry and solving practical mathematical problems.
Access NaCCA-aligned Support Packs
Download your structured NaCCA-aligned Teacher Support Pack and Student Learning Pack, designed for clarity, practicality, and reliable teaching and learning.